Sunday, March 24, 2013

The Sweater of Failure: A Knitting Adventure


Ever done a project that was just doomed from the start?  And even though you knew it was doomed, you kept at it because you had already put so much time and effort into it?  And you tried to convince yourself that the mistakes wouldn’t matter and it would work out fine?  And when you couldn’t convince yourself of that you tossed the project aside until it called out to you like unrequited love, ‘Finish me!  Finish me!’ 

Yeah, that was about the experience I had knitting my first sweater.  Except that mine has a happy ending.  For all the mistakes I made, the sweater actually turned out pretty decent.  Hooray!

Here’s what I attempted to knit:


The pattern is from a Knitscene magazine from Fall 2011.

And here is what I ended up with:


Not bad, you may say.  Looks cute.  And somehow it is cute.  And wearable.  Just not at all the sweater from the magazine.

Let’s go back to the beginning, way back in the summer of 2011.  I had just bought a bunch of knitting magazines on clearance from the going-out-of-business Borders.  I eagerly went through them, picking out my favorite sweaters, poring over the instructions to find one that seemed easy enough for me to actually do.  I settled on this one, called the Hawkmoth Pullover, because it appeared easy enough.  No cables, no knitting in the round, minimal shaping.  Perfect for my first sweater.


The trouble began before I even bought the yarn.  I went online to find the yarn used in the pattern, but it seemed expensive so I decided to go to a yarn store around the corner and get something there.  I went in and picked up four skeins of a beautiful purple fluffy yarn.  I brought it home, wound it into a ball, and was about to start knitting when I looked at the directions.  The yarn required for the pattern was extrafine, lace weight yarn.  I had bought big, bulky, needle size 10 yarn.  From a store with a no return policy.  Awesome.
(I did use that yarn to make a big fluffy scarf, so it didn’t go to waste.)


Too embarrassed to go back to that store for more yarn, I went to Joanne’s.  This action proved to be fortuitous in the future, but I’ll get to that.  Now Joanne’s does not have the largest yarn selection, in my case there was no lace weight yarn.  So in my wisdom I decided that sock weight yarn would be good enough.  Oh, Ashley.

Now with my new yarn balled up and ready to go, I got started.  It was a simple enough pattern, just cast on and knit forever, increasing and decreasing every once in a while.  I thought it was smooth sailing.  It took a long time to get very much knit since the yarn was so thin, but it was the perfect project to pick up while watching TV. 


I worked on it sporadically and finished the front panel in about three months.  Then I started on the back panel.  One day I looked at the directions for knitting the sleeves.  It said to cast on and knit in stocking knit stitch.  “How odd” I thought.  “Why would the sleeves be in stocking knit while the body is in garter stitch?”  Then I reread the directions for the body and right there in black and white it said: Work in St St.  As in stocking knit stitch.  As in not garter stitch, which is how I had knitted the entire front panel and half the back panel.  

No.  No no no no no no no. 

That’s right folks.  I had knit almost half the sweater using the wrong freaking stitch!  All of a sudden, clarity!  That’s why the directions said right side and wrong side (both sides are the same in garter stitch).  That’s why the sweater in the magazines picture didn’t look bunchy like garter.  In case you don’t know, this is what garter stitch looks like:


And here is good ol’ stocking knit:


Aargh!  I couldn’t believe that I had missed that crucial piece of information!  Feeling stupid and frustrated I tossed the knitting aside and didn’t pick it back up until my wounds had healed a bit.  I had come so far I decided I should still finish it and see how it turned out.  But my problems did not stop there!


During this same time my husband was already living in Albuquerque while I finished my degree in LA.  I flew out to ABQ about once a month to see him, and I would always bring this knitting on the plane with me.  So, one such day when I was flying through the skies I pulled out the sweater to work on it.  And all that came out of the bag was the sweater.  As in, no needles, because they had slipped out of the yarn. 

If you are a knitter, chances are you have had this tragedy befall you.  A tiny hole had formed in the bottom of my knitting bag, and the needle holding my work slipped right through that hole and out of the bag.  Leaving all the stitches precariously unprotected, just waiting to unravel.  Getting slipped stitches back on a needle is a horrendous pain!  Tedious and awful.  So that’s how I spent that flight, carefully slipping each stitch back onto the needle.  

After counting my stitches I found that I had missed about 5 stitches.  I convinced myself it wouldn’t show and I knit a few rows to see.  It showed.  Big time, five big holes right at the bust line so it would be super obvious.  I ended up ripping out about ten rows down past where I lost the stitches and started from there.  And from then on I always put a rubber hand on the needle to keep it put!


I kept at it, finished the back panel and one sleeve.  The end was in sight when halfway through the second sleeve, I ran out of yarn.  I thought I had one more skein in my stash, but I did not.  No problem, I ran out to Joann’s to get some more.  But the evil knitting gods were not done torturing me.  My local Joann’s did not have the yarn.  I frantically went to Michael’s and Hobby Lobby with no luck.  I couldn’t believe it, to have come so far with this stupid sweater just to run out of yarn when I had 7 inches of sleeve left!  Once again the sweater was thrown in a corner as I pouted out my frustrations.

Two months later I was in Arizona for Thanksgiving.  Phoenix has a few Super Joann’s (which ABQ does not to my everlasting disappointment) and that was my last hope for finding the yarn.  (I didn’t keep the yarn label so I didn’t even remember the brand name to find it online, just how the logo looked.) 

My heart was pounding as I walked through the yarn aisles, searching for my yarn.  And then, the clouds parted, sunlight streamed in, and angels sang, because there it was!  I bought two skeins to be safe and went home ready to finish this sweater!


Even though I hadn’t worked on the sleeve in more than a month, I just picked it up and started knitting.  I thought I remembered the pattern.  I did not.  I knit about 5 inches when I realized that the sleeve did not look like the other one.  I looked at the directions and realized I had been knitting the last 5 inches completely wrong.  (And with small yarn and needles, 5 inches took me about 2-3 hours to knit).  Wasn’t this stupid sweater done punishing me yet!  I ripped out all my work and started over yet again.

Luckily for me, that was my last big mistake.  I finally finished the sleeve, stitched all the pieces together, wet and blocked the sweater, and crossed my fingers that it would fit when it dried.  And halleluiah because it did!  The sleeves were long enough, the body was long enough, and it wasn’t slipping off my shoulders.  It looks nothing like the pattern picture and it looks like I’m wearing it inside out, but who cares! 

All in all it took me over a year and half to make this.  And you may notice that just about all my mistakes were because of my lack of foresight and planning.  And reading.  I seem to have a habit of jumping right into craft projects without thorough preparation.  But after this I have definitely learned my lesson!  If I ever dare to take on a sweater again, you can be sure I will be following that pattern like my life depended on it!

Even though this project seemed like endless frustration, I am glad that it actually turned out as cute as it did and I have something to show for my efforts.  Next up on my needles: a pair of socks.  Wish me luck!


Monday, March 4, 2013

Fabric Covered Cork Necklace Display


I used to keep my necklaces all jumbled together in a jewelry box.  Not only did this just tangle all the chains into crazy knots, but some necklaces would sink into the depths of the box and I would never wear them. 

After the millionth time of unknotting frustrating chains, I finally decided I needed a better way to store my necklaces.  I also wanted them to be displayed so that I could actually see them.  Here’s what I came up with:


It’s just cork board covered with fabric and some push pins to hold the necklaces.  Easy to make, and a great way to show off my necklaces!  And now that I can actually see them all, I find that I am wearing them more and wearing ones I had forgot I even had!  Plus I like how displaying jewelry like this makes them more like art, something to see and enjoy every day.

These are easy to make (I whipped them up in about an hour) and you can really customize this to your décor, through your fabric choice or even cutting the cork in different shapes. 

Ready to make your own?  Here’s what you need:


Corkboard Tiles:  I bought these at Michaels.  The squares are 12”X12” and I cut them into 6”X6” squares and circles.  Don’t buy the roll of corkboard because that would be too thin.

Fabric:  Pick your favorite fabrics from your stash.  You don’t need much fabric at all, just a 7”X7” square and a 7” diameter circle if you make them the same size as mine.  Obviously if you cut your cork larger you will need more fabric. 

Push Pins:  I used map pins because I liked the round tip.  Decorative push pins would be cute too.

Other:  Hot glue gun, scissors or exacto knife, nails and hammer for hanging, and of course, some beautiful necklaces to display.

Optional:  Felt to use as backing.

First step is to cut your corkboard.  You will need two layers of corkboard to make it thick enough (so that your push pin doesn’t poke all the way through).  I wanted two finished circles, so I used a container and traced four circles on one sheet of corkboard.


I also wanted two squares, so I used a ruler to square out another sheet of corkboard.


Cut the shapes using scissors or an exacto knife.  The cork is soft enough that scissors work easily. 


Once you have your shapes cut out, stick them together with the sticky tabs that came with the cork tiles, or use glue.


Now it’s time to add the fabric.  Just trace around your shape on the wrong side of the fabric, leaving about one inch of extra fabric.  Cut this out.


If you are making a circle, cut some slits in the fabric so that it will be easier to glue down without bunching.


Start gluing down the fabric, making sure to pull the fabric taut.


To finish it off I glued down a piece of felt to the back, just to tidy it up and to keep the fabric from snagging or becoming loose.  This step is optional.


That’s it!  Repeat the process for your other pieces.


Now it’s time to put in the push pins.  I couldn’t find any in the color I wanted (silver) so first I painted my push pins to get the color I wanted.


With my silver pins ready, I stuck them into the corkboard.  Try different arrangements, just make sure not to overlap the pins because then your necklaces will overlap.


Now it’s time to hang them up and put on the bling!  I hung mine up with nails; if you don’t want to put holes in your walls then sticky tabs might work if your necklaces aren’t heavy.  Most of mine are, so I wanted the displays to be sturdy.


Hang your necklaces, step back and enjoy!


I used the other circle to hang some bracelets (bracelets don’t hang as well as necklaces I have discovered).


And that’s it!  This project took me less than an hour to make and I love having all my necklaces out where I can easily see them.  No more knotted chains for me!

Thanks for reading!


Thursday, February 21, 2013

Leather Lace Finger Knitting


Did I say I’d put this post up Tuesday?  I obviously meant Thursday. 
Anyway, on Monday I shared a tutorial  on how to finger knit.  Today I am showing how I upgraded the technique using leather lace to make some cool and funky accessories. 

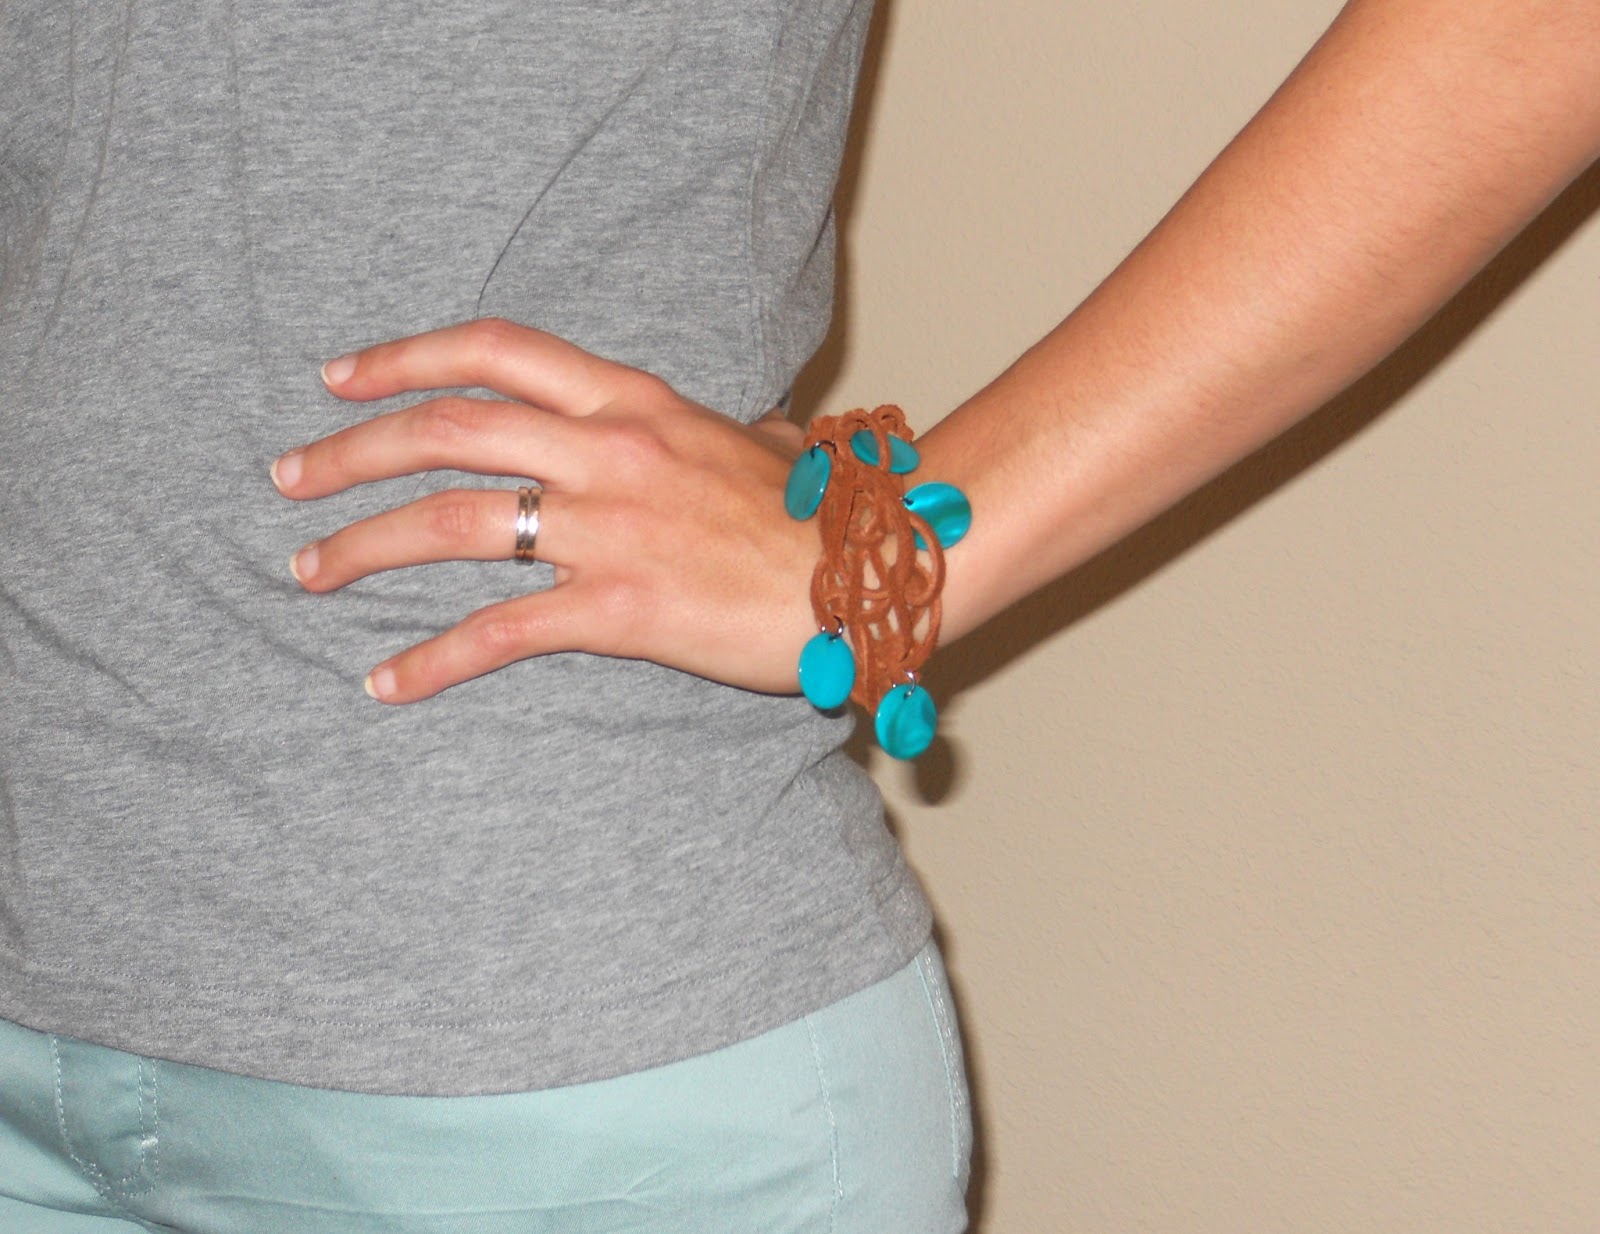
I made a necklace and bracelet that I love:


Another necklace that is so so:


And a belt that did not turn out as awesome as I envisioned in my head.  I think I’ll work on that design a bit more and see if I can make it work out.

Want to make your own awesome leather jewelry?  Here’s what I used:


Leather Lace:  You can find leather lace at your local fabric store (I got these at both Joann’s and Hancocks.  Mine is ¼ inch thick.)  The length varies based on what you are making.  For the bracelet I used 3 yards, for the necklace I used 4 yards. If you want to take a stab at making a belt you will need at leat 10 yards.

Leather Cording:  In the second picture shows leather cording, it is much skinnier and better for adding beads to.  I used 8 yards for the long necklace.

Bedazzlement:  Grab some funky charms, beads, or whatever to add on.  Also helpful, some jewelry clasps and rings.

Refer back to the finger knitting tutorial if you need a reminder on how to do that.  Working with leather lace is much different from working with yarn.  Yarn is stretchy so you can easily pull it away from your fingers, but the lace is stiff and tight, so you need to make sure that you keep it loose around your fingers.


In the above picture you can see how I pulled the lace away from my fingers to make it easier to pull off.  Also, the leather lace can snap if you pull it too tight, so another good reason to keep it loose.

For the bracelet and necklace made with the leather lace, I just knit them up as normal and added the charms afterwards using jewelry rings.  Super easy!

For the black necklace using the leather cording I added the beads as I knit.  To do this, before you start you need to string all the beads you will use onto the cording.


Start the finger knitting as normal.  After the first pass, pull up four beads and arrange them so one is under each finger, like this:


Then just knit as normal, making sure that the bead stays next to the finger.


Does that make sense?  Do this for each finger.  Work one row with no beads, then pull up four more beads and repeat.  Keep doing this until you have the length you want.  Here is an up close shot of the finished necklace:


It is funky and chunky and I love it!

To finish off each piece I added some jewelry clasps.


These were fun to make and are fun to wear!  Hope you try it out!

Monday, February 18, 2013

Finger Knitting Tutorial


Looking for a quick, super simple, and mindless craft?  You have found it in finger knitting!  You use your fingers and yarn to create a long chain that looks like this:


When I was a kid and my mom needed to keep us quiet during boring things, she would pull out a stash of yarn and let us go to town.  I would knit a chain longer than me using a whole skein, and then wrap it all around me like a scarf or necklace.

Now, you may be thinking, cute story, but what would I do with a long chain of yarn?  Honestly, not much.  But, how 'bout instead of yarn you used leather strips?  Bedazzle that up and you’ve got yourself an awesome bracelet, or necklace, or belt!


Pretty stylin’ right?

This tutorial will teach you how to finger knit, then tomorrow check back to see how I turned it from kid craft to runway chic!

This tutorial has a lot of pictures, but that’s to help you get it down!  This really is an easy craft and even young kids can do it.  So grab a ball of yarn to practice and let’s get started!

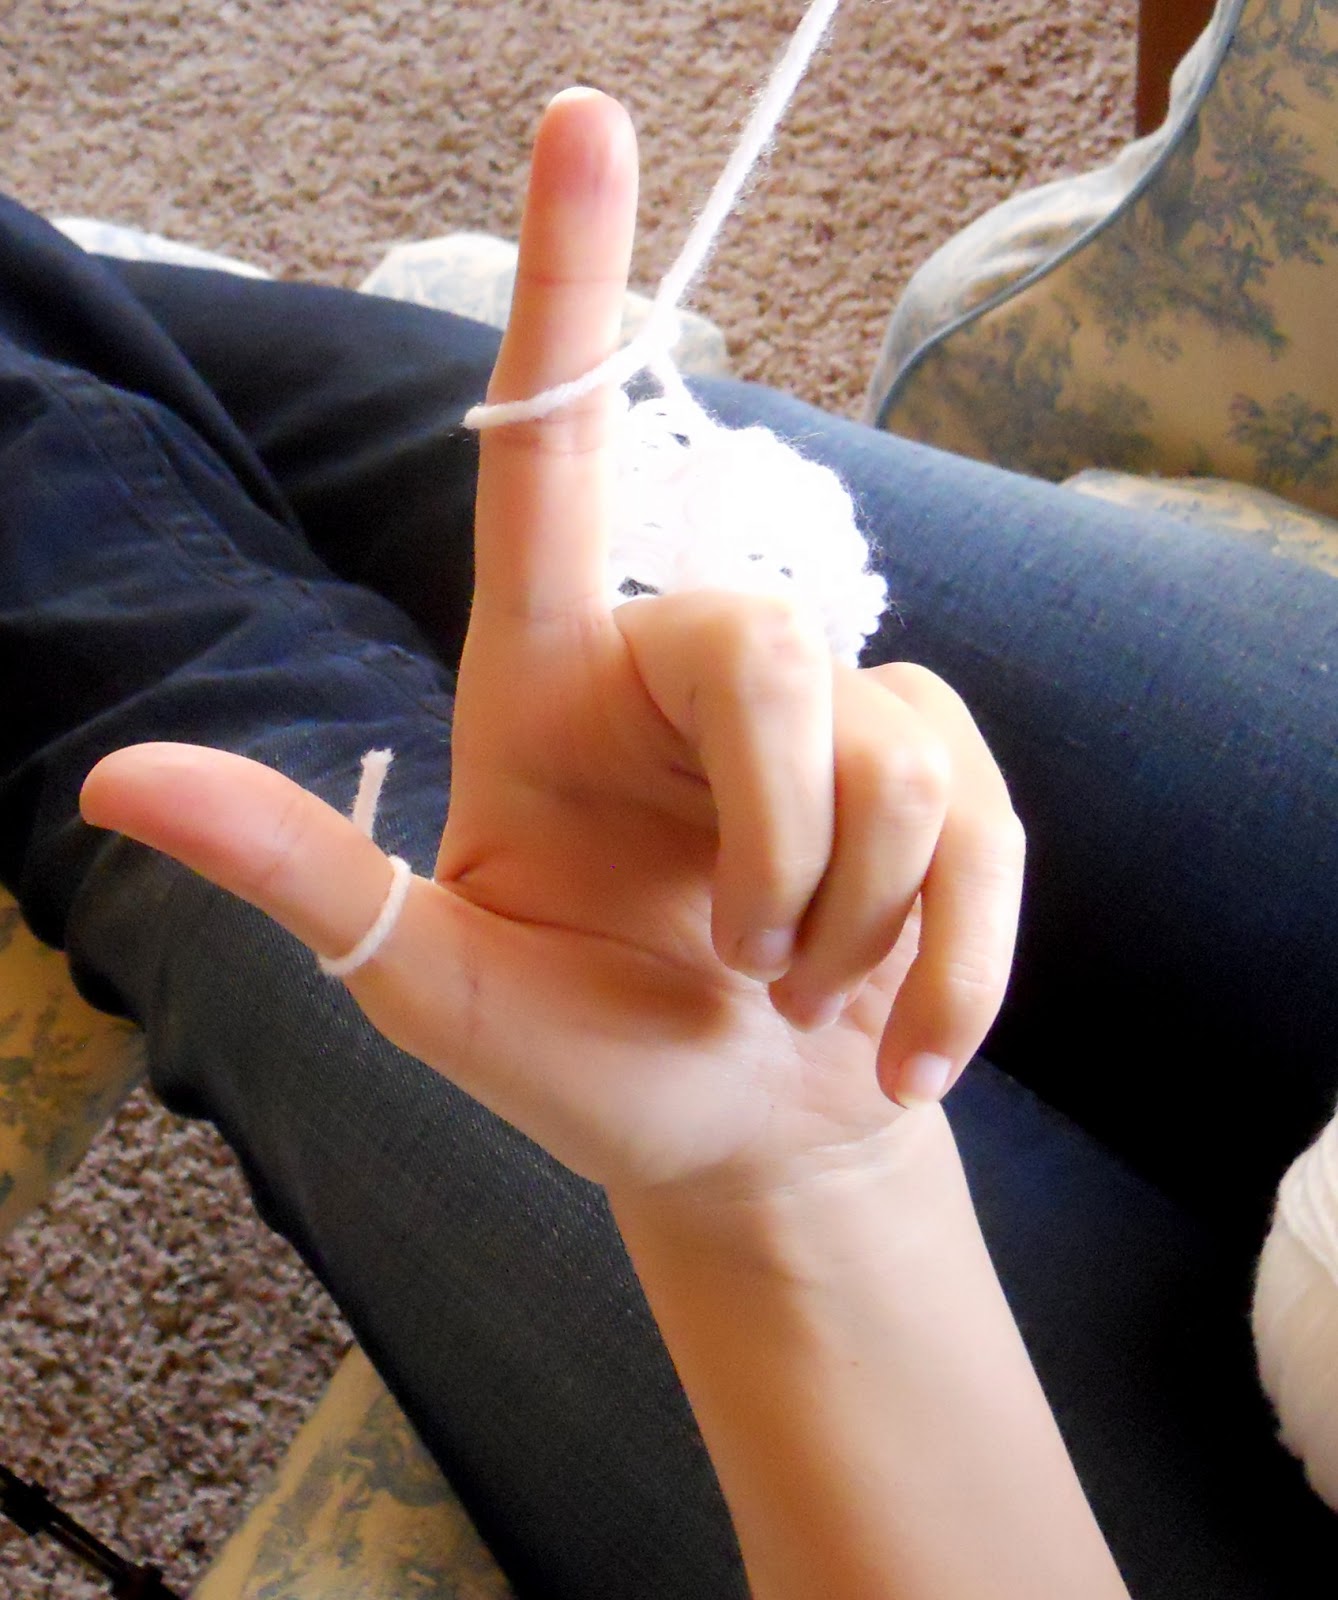
First let’s set things up.  You'll be working straight off the ball of yarn, so no need to measure out a length.  Tie the end of the yarn around the thumb of your non-dominant hand.  (I’m right handed so I used my left hand.  Use whatever hand is comfortable for you, the process is the same.) 

With the yarn secured to your thumb, weave the yarn behind your index finger, in front of your middle finger, behind you ring finger, and in front of your pinkie, just like this:


Then, just weave the yarn back.  Draw it around your pinkie finger, in front of your ring finger, behind your middle finger, and in front of your index finger.  It should look like this:


Now take that string behind your hand, like this (with handy arrows pointing the way):


And then bring the string back up to your thumb:


Alright, that’s the set up!  Now to start knitting.

Starting with the index finger, place the long strand above the strand on the index finger.  (The long strand is the one across your palm.)  Pull the bottom strand (the strand on the finger) away from the finger creating a hole.  Put your index finger through that hole and slip the yarn behind the finger. 

Sound confusing?  Here’s some pictures to help.  The first one shows the hole, with the long strand on top and the finger strand on the bottom:


The finger goes through that hole and the yarn you are pulling goes behind the finger.


Making more sense now?  Repeat this move for each finger:


And that’s it!  If it doesn’t make sense, just try it a few times following closely to the pictures and you’ll get it. 

To keep going all you do is wrap the yarn around your hand again from back to front:


And repeat the process.  Do this over and over as long as you like (it can actually get to be a soothing process from the repetitiveness of it) and pretty soon you will have a funky looking chain of yarn on your hand.


Finishing this off is simple.  When you have a length that you like, just cut the yarn leaving at least 5 inches. 


Just slip that yarn end through each finger loop, pulling it off the finger as you go.


When you take it off it will look like this:


But to turn it into that skinny chain, just pull on both ends and voila!


And that’s it!  Easy right?  And now you have a cool and funky yarn chain!


This tutorial was just to show the finger knitting basics.  Tune in tomorrow to see how I used this process to make a more stylish, adult version!