Monday, April 22, 2013

Chocolate Pecan Mini Pies


Back in California there was a local bakery that sold yummy little mini pies, and their chocolate pecan pie was the best thing ever.  Seriously, eating one of those little pies was otherworldly, they were so good!  It was a sad, sad day for me when they stopped making them.  Which is why I was super excited a few weeks ago to find a bakery in Albuquerque that also made mini chocolate pecan pies. 


I eagerly bought one, expecting the same deliciousness of the pie from California, when I spotted a crucial word on the label: green chili.  Yes, this was a green chili chocolate pecan pie.  (Green chili is seriously in everything here.)  No matter, I thought.  Chocolate will win this battle and it will still be good.  And yes it was good.  But it was not epic.  I like green chili as much as the next person, but in my burrito, not in my chocolate!


As I shook off my disappointment, it occurred to me that rather than try to find that elusive perfect pie, why don’t I make one myself!  Fate was on my side, as a few days later I spotted a tartlet pan on clearance at Target.  (Mmm, tartlets.  Tartlets.  Tartlets.  An internet high five to whoever gets that reference.)


I searched online and through my cookbooks for a chocolate pecan pie recipe, but I couldn’t find one that seemed right.  Finally I decided to take my mom’s pecan pie recipe and just add chocolate.  (Seems simple, but I was surprised by all the weird or complicated recipe’s out there.) 


Now my mom’s pecan pie recipe is really just Dear Abby’s Famous Pecan Pie recipe (which is the best one in my opinion.)  I think what makes it so good is that it uses brown sugar instead of white, which just gives it a little extra yumminess.  I just took that recipe and added melted chocolate, and the result was even better than I expected!  These were some seriously yummy pies!


The recipe makes 12 mini pies or one 9 inch pie.  After I made these my husband said we should freeze them since we wouldn’t be able to eat 12 pies before they went bad.  Um, no.  These suckers were gone in about 5 days.  They looked so cute displayed on my purple dessert stand that I thought about inviting people over to partake, but in the end I kept all the yumminess for myself.  Guess I’ll just have to make some more!


I made the crust from scratch, because you cannot beat homemade pie crust, but you can use store bought crust too.  I also experimented a bit on the type of chocolate I used.  I made pies using dark chocolate, milk chocolate, and semi-sweet chocolate.  And really there wasn’t much difference, but I think the dark chocolate was slightly richer, so that’s my recommendation. 

Now that you just cannot wait to make your own, here’s the recipe:

Chocolate Pecan Pie, adapted from Dear Abby’s Pecan Pie

1 9-inch unbaked pie crust
1 C. light corn syrup
1 tsp. vanilla
3 eggs, slightly beaten
1/3 C. butter, melted
¼ tsp. salt
1 C. firmly packed brown sugar
½ C. dark chocolate chips
1 heaping C. pecan halves

Preheat the oven to 350. 

In a large bowl, combine corn syrup, vanilla, eggs, butter, salt, and brown sugar.  Mix well.  Melt the chocolate in the microwave in 20 second intervals, stirring after each one until chocolate is smooth.  Add to the bowl and mix well.

To make one 9 inch pie:  Roll out crust dough and place it in a 9 inch pie dish.  Pour in the pie filling.  Arrange the pecans on top in an attractive manner.  Bake for 45-50 minutes or until center is set and toothpick comes out clean.  The pie will puff up during baking, but will deflate as it cools.

To make 12 mini pies:  Roll out crust dough and cut out 12 circles.  I used a mug that was the same size as the tartlet pan to cut out my circles.  You can also add leftover dough to make more of a crust edge.  Fill each pie well ¾ of the way full.  Add the pecans.  Bake for 40-45 minutes, or until toothpick comes out clean.  Let cool in pan for 15 minutes before taking out.

If you make the mini pies, don’t overfill the pie wells, or you will get this:


Hardened, crystalized pie filling that will rip your teeth out if you try to eat, which I may have tried to do.  My second attempt was better:


These were seriously so good.  And this recipe is very simple and easy, my favorite kind!  Top these off with some whipped cream, and I guarantee they won’t last long!


Now I shall never want for a delicious chocolate pecan pie again!  Hope you try these out!  Thanks for reading!


Thursday, April 11, 2013

Hair Towel Wrap Tutorial


Today’s project is quick and easy.  For a while I have been wanting a new hair towel wrap, the kind that are held in place in the back with a button.  If you don’t know what I mean, one of these bad boys:


Lovely bathroom shot.

I have a towel wrap that I’ve had for over 13 years.  And it was a hand-me-down from my sister, so who knows how old it actually is.  It still works just fine, but the fabric is pretty worn and getting that weird crunchy-towel feeling that doesn’t go away when you wash it.  Gross.

I’ve never actually seen one of these things in a store though, so I knew I had to make one myself.  (Although they probably sell these in beauty supply stores, which I never go to.  But it’s more fun to make something than buy it anyway!)  I had some bright yellow towel fabric that I got a Joann’s a long time ago for another project, so I pulled it out and whipped this up in less than an hour!

Want to make your own?  Here’s what you need:


Towel Fabric:  You can use an old towel or buy fabric at Joann’s.  Or find some clearance towels on a Target end cap.  You just need to have enough fabric to make two pieces that are 27” long and 9 ¾” wide.  (So if you are using old towels that are standard size, you will probably need two.)

Cord:  Or sturdy yarn.  You will need 6 ½”.

Button:  Dig through your stash and find an awesome button to add some flair to your head wrap.

Okay, let’s get started!

First you need to make a pattern for your head wrap.  I used my old one and drew out a pattern on paper, but it is an easy enough shape that you can recreate it on your own.  Here’s what it should look like:


To make your own, draw a straight line that is 27” long.  From the center of that line measure down 9 ¾” and make a mark.  Then draw a curve from that center point up to each end of the long line.  In the picture you can see that the left side is a narrow curve, while the right side is a wide curve, so make sure you draw it out like that.

Once you your pattern cut out, use it to cut out two pieces from your fabric.  Lay your fabric together and pin along the curved side of the fabric.


Then just sew along that curve leaving a ¼" margin.  I sewed a straight line, then went back and sewed a zig-zag in the margin, just to keep it from unraveling and spitting out little towel bits.  Which, by the way, you will get all over the place while you are making this, especially noticeable if you are wearing black sweatpants.


Once you are done with that, lay the wrap down on your work table and open it up, wrong side facing you.  Take your piece of cord, fold it in half and pin it to the narrow point of the wrap.  (Remember, one end has a narrow curve, the other end a wide curve.  Pin it to the narrow end.)


Make sure you pin it right where the two sides meet.  Sew that down.

Next you need to hem the whole outer edge.  To make sure you don’t have any loose ends showing, fold the edge over slightly, then fold it again and pin it down.


Pin the whole way around and then sew it down.  I used the zig-zag stitch again so that the edge would lay nice and flat.  The cord should also be folded down, just sew right on over that.


Then just fold it back up and stitch it in place.


And just ignore the wonkiness, it looks fine even if it isn't perfectly straight.  The finished end should look like this:


Almost done!  Just take your button and hand stitch to the other end of the towel, on the wide curved end right where the two fabric’s meet.


And that’s it! 


You are done and ready to rock that head wrap!


Yes I know I’m awesome.  Here’s a shot of the back:


Now I have nice soft and fluffy new hair wrap!  This is a great project for beginner sewers, nice and easy!  I hope you try it out!  Thanks for reading!


Thursday, April 4, 2013

Freezer Paper Stencil: Workout Tees

On Pinterest a while back I saw some workout tees with funny sayings on them.  Immediately I knew I had to make some of my own.  Sometimes I need a little extra motivation to make it to the gym, and I knew a new shirt with a witty phrase would be just the trick!

I ended up making two: one funny and one with my workout mantra:


I think I saw the phrase ‘I am making myself epic’ in a Nike ad a long time ago, but I don’t really remember.  But, it definitely gets me motivated when I’m in the middle of a workout and don’t want to keep going.  Having it right there on my shirt makes me feel like working extra hard!

The one that says ‘I lift things up and put them down’ is from a Planet Fitness ad.  Have you seen these ads?  They are so funny.  There weren’t any Planet Fitness’ in LA, so I didn’t hear of them until I moved to ABQ.  Here is the ad this phrase is from, so you can join in the hilarity:


Ha, that makes me laugh whenever I hear that. I don't go to that gym, but they have funny ads.

Now, on to the making of these awesome tees. 

I made a stencil out of freezer paper.  Have you ever done this before?  It is super easy, and I know there are lots of tutorials about it out in the universe already, but I’ll throw my two bits in. 

I like using freezer paper because it is so cheap, so if you mess up while cutting out your stencil you can just toss it and start over.  I used my Silhouette machine to cut out my design, but you can also just cut it out by hand using a knife or scissors.  

Here’s what you need to make some tees like mine:


Freezer Paper:  You can find this at the grocery store or Target/Walmart, it’s usually by the aluminum foil or wax paper.

Fabric Paint:  I use the Tulip brand (bought at Jo Ann’s).  I’ve used this paint before and I really like it.  

T-Shirts:  I used 100% cotton tees that I got at Target, they are Champion brand. 

Other:  Iron, to set the freezer paper.  Knife or scissors to cut out your design if you aren’t using a machine.  Paint brush or sponge to apply the paint. Awesome phrase to get you pumped to workout.

First, you need to decide how you want your phrase to be laid out on your shirt.  Put the shirt on and mark with a pencil where you want the words to start and end, as well as how far to the sides you want the words to go.  I didn't want to words to wrap around my body and make it hard to read.


Take it off and measure your markings.  For example, the markings for my ‘lift’ tee ended up being 9” wide and 14” long, starting about 3” down from the collar.  Since I wanted four rows of words, I used my measurements to calculate that my letters would need to be 3” tall with ½” space in between each row.  Make sense?  Figure all this out before you even start so that it comes out looking just how you want it.

After getting that all figured out, write out your phrase in the Silhouette program or Word.  If you are using Word, make sure you bold the letters so that they are big enough to cut out as a stencil (or use Word Art to get the bigger letters.)  I like using the Silhouette program because it makes it easy to get the letters to the right size.


If you are using Word, when you design is done, print it out and lay the freezer paper on top of it shiny side down.  Then just trace your design onto the freezer paper and cut it out.

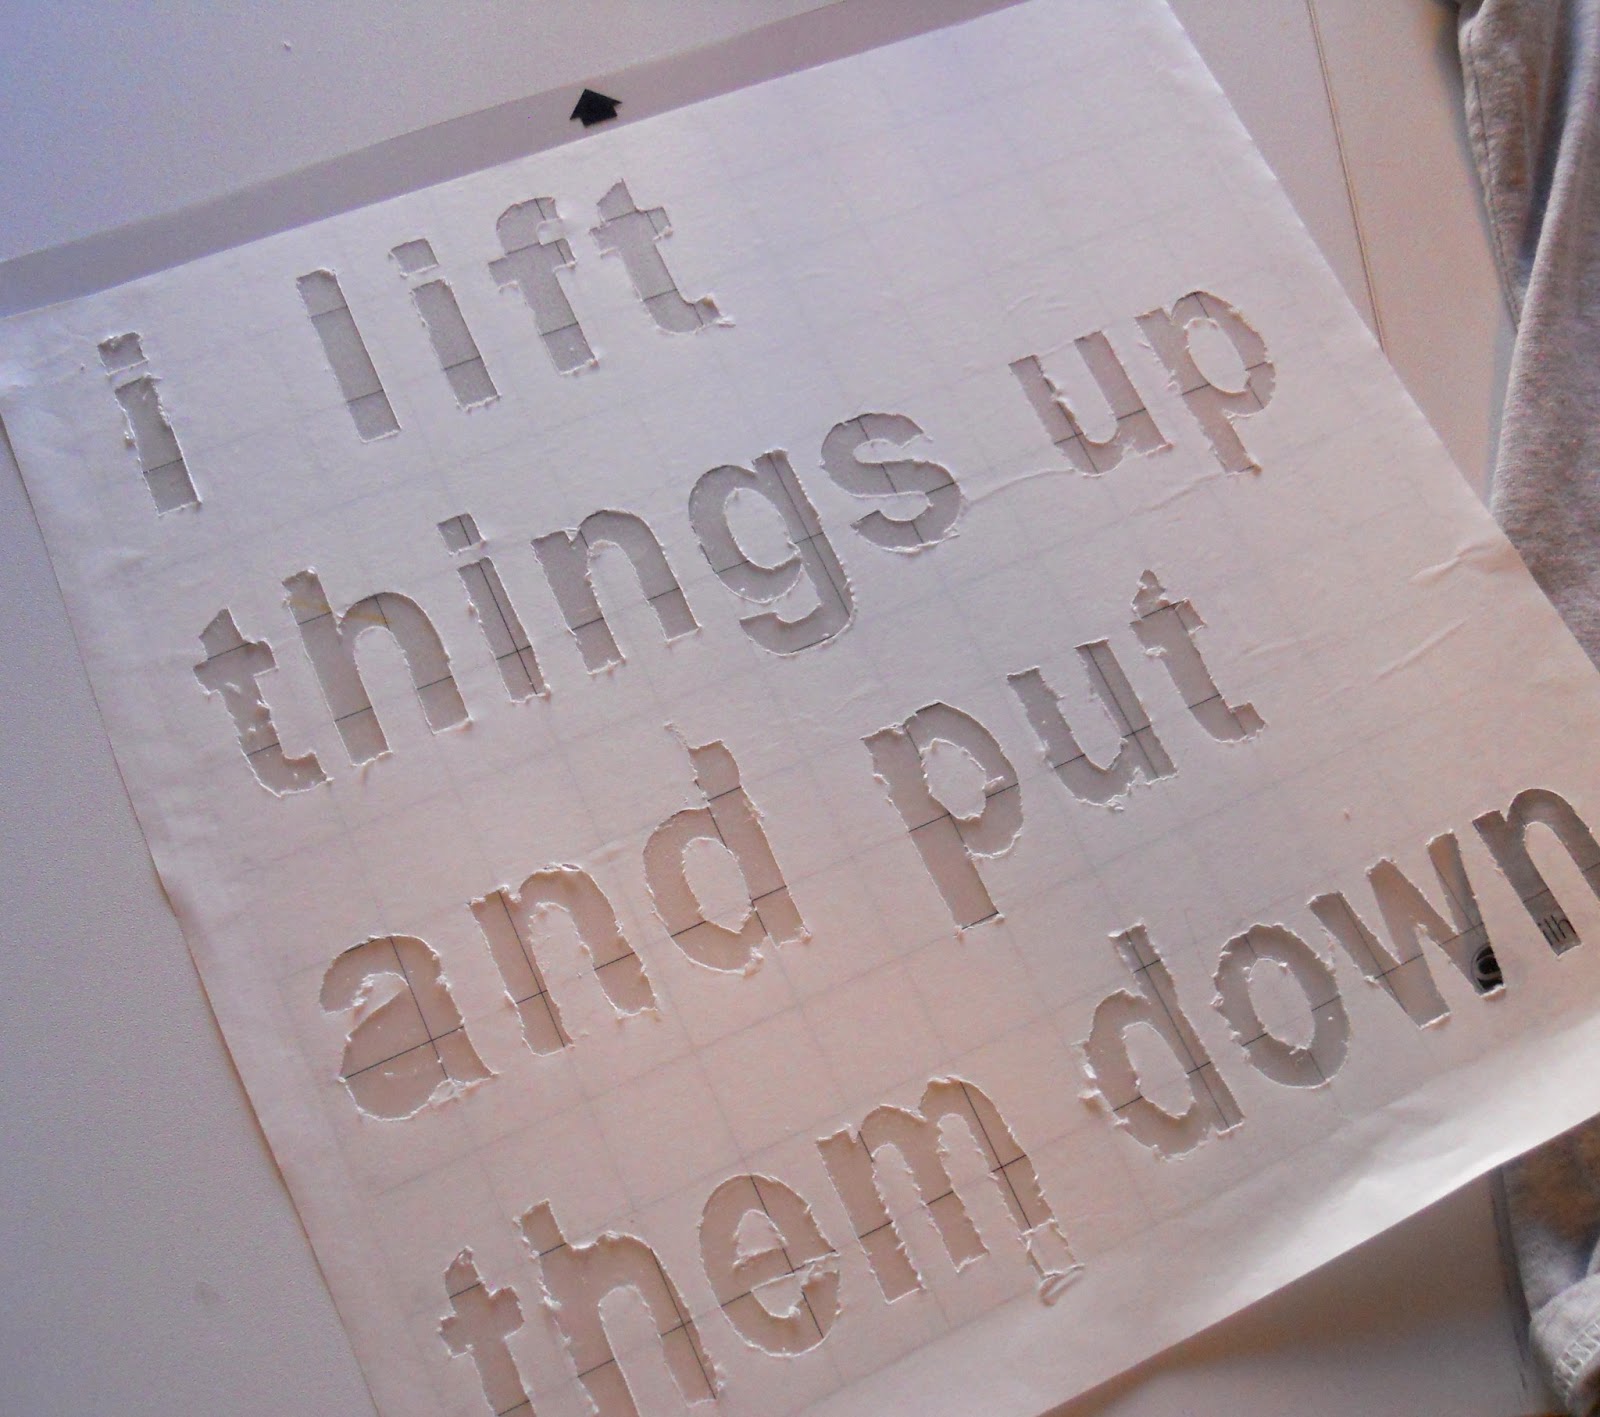
If you are using a Silhouette, cut out the freezer paper into a 12x12 square and stick it to a cutting mat with the shiny side down.  Then follow the steps to cut it out.  It took me a few tries to get the right cutting settings for the freezer paper.  I set the blade length to 5 and selected cut twice, and I still had to use a knife to get some of the letters off.  So, I suggest doing practice cuts (which I didn’t do) until you find the setting that works for you.  You'll notice in the 'lift' tee that the letters aren't very crisp because I had to cut them out more, but in the 'Epic' tee I had adjusted the settings and the letters came off easier. 

Once that’s cut, peel out the letters.


And then peel off the freezer paper.  I will get all rolled up like this:


But it easily lays flat once you start ironing it:


Use a high heat for your iron, and make sure everything is down nice and tight so you don’t have any paint bleed.  Remember, iron the shiny side down.  Now it’s time to start painting!

First, but a piece of cardboard or thick paper in your shirt so the paint won’t bleed to the other side.


And make sure that piece is big enough.  Mine wasn’t and so I did have some paint bleed through to the back of the shirt, but it’s not too noticeable.  Then just squirt out your paint and put it on.


Once your paint is on, carefully peel off the freezer paper.  Don’t wait for the paint to dry before taking the paper off, as that increases the chances that the paint may bleed.  Also be careful as you take the paper off that you don’t drop it and get paint on other parts of your shirt, or your craft table.  You can see my table’s nice new black smear in the upper right corner of this pic:


Oops.  

That’s it!  Let your paint dry, and follow the directions on the bottle (I know some brands need to be set by ironing, but the paint I used doesn’t.)  While that one is drying make yourself another awesome tee.


And done!  This was a quick and easy project, I made both of these in an hour (besides drying time). 


And now I am ready to look awesome showing off my muscles at the gym:


Or maybe out on a run:


Or maybe just jumping around in my backyard while my neighbor looks at me like I'm a weirdo.

My husband insisted I take a picture holding a water jug like the dude in the commercial.


Yep, I am now the coolest chick at the gym.  Hope you try out this technique and make your own awesome shirts!  Thanks for reading!

Sunday, March 24, 2013

The Sweater of Failure: A Knitting Adventure


Ever done a project that was just doomed from the start?  And even though you knew it was doomed, you kept at it because you had already put so much time and effort into it?  And you tried to convince yourself that the mistakes wouldn’t matter and it would work out fine?  And when you couldn’t convince yourself of that you tossed the project aside until it called out to you like unrequited love, ‘Finish me!  Finish me!’ 

Yeah, that was about the experience I had knitting my first sweater.  Except that mine has a happy ending.  For all the mistakes I made, the sweater actually turned out pretty decent.  Hooray!

Here’s what I attempted to knit:


The pattern is from a Knitscene magazine from Fall 2011.

And here is what I ended up with:


Not bad, you may say.  Looks cute.  And somehow it is cute.  And wearable.  Just not at all the sweater from the magazine.

Let’s go back to the beginning, way back in the summer of 2011.  I had just bought a bunch of knitting magazines on clearance from the going-out-of-business Borders.  I eagerly went through them, picking out my favorite sweaters, poring over the instructions to find one that seemed easy enough for me to actually do.  I settled on this one, called the Hawkmoth Pullover, because it appeared easy enough.  No cables, no knitting in the round, minimal shaping.  Perfect for my first sweater.


The trouble began before I even bought the yarn.  I went online to find the yarn used in the pattern, but it seemed expensive so I decided to go to a yarn store around the corner and get something there.  I went in and picked up four skeins of a beautiful purple fluffy yarn.  I brought it home, wound it into a ball, and was about to start knitting when I looked at the directions.  The yarn required for the pattern was extrafine, lace weight yarn.  I had bought big, bulky, needle size 10 yarn.  From a store with a no return policy.  Awesome.
(I did use that yarn to make a big fluffy scarf, so it didn’t go to waste.)


Too embarrassed to go back to that store for more yarn, I went to Joanne’s.  This action proved to be fortuitous in the future, but I’ll get to that.  Now Joanne’s does not have the largest yarn selection, in my case there was no lace weight yarn.  So in my wisdom I decided that sock weight yarn would be good enough.  Oh, Ashley.

Now with my new yarn balled up and ready to go, I got started.  It was a simple enough pattern, just cast on and knit forever, increasing and decreasing every once in a while.  I thought it was smooth sailing.  It took a long time to get very much knit since the yarn was so thin, but it was the perfect project to pick up while watching TV. 


I worked on it sporadically and finished the front panel in about three months.  Then I started on the back panel.  One day I looked at the directions for knitting the sleeves.  It said to cast on and knit in stocking knit stitch.  “How odd” I thought.  “Why would the sleeves be in stocking knit while the body is in garter stitch?”  Then I reread the directions for the body and right there in black and white it said: Work in St St.  As in stocking knit stitch.  As in not garter stitch, which is how I had knitted the entire front panel and half the back panel.  

No.  No no no no no no no. 

That’s right folks.  I had knit almost half the sweater using the wrong freaking stitch!  All of a sudden, clarity!  That’s why the directions said right side and wrong side (both sides are the same in garter stitch).  That’s why the sweater in the magazines picture didn’t look bunchy like garter.  In case you don’t know, this is what garter stitch looks like:


And here is good ol’ stocking knit:


Aargh!  I couldn’t believe that I had missed that crucial piece of information!  Feeling stupid and frustrated I tossed the knitting aside and didn’t pick it back up until my wounds had healed a bit.  I had come so far I decided I should still finish it and see how it turned out.  But my problems did not stop there!


During this same time my husband was already living in Albuquerque while I finished my degree in LA.  I flew out to ABQ about once a month to see him, and I would always bring this knitting on the plane with me.  So, one such day when I was flying through the skies I pulled out the sweater to work on it.  And all that came out of the bag was the sweater.  As in, no needles, because they had slipped out of the yarn. 

If you are a knitter, chances are you have had this tragedy befall you.  A tiny hole had formed in the bottom of my knitting bag, and the needle holding my work slipped right through that hole and out of the bag.  Leaving all the stitches precariously unprotected, just waiting to unravel.  Getting slipped stitches back on a needle is a horrendous pain!  Tedious and awful.  So that’s how I spent that flight, carefully slipping each stitch back onto the needle.  

After counting my stitches I found that I had missed about 5 stitches.  I convinced myself it wouldn’t show and I knit a few rows to see.  It showed.  Big time, five big holes right at the bust line so it would be super obvious.  I ended up ripping out about ten rows down past where I lost the stitches and started from there.  And from then on I always put a rubber hand on the needle to keep it put!


I kept at it, finished the back panel and one sleeve.  The end was in sight when halfway through the second sleeve, I ran out of yarn.  I thought I had one more skein in my stash, but I did not.  No problem, I ran out to Joann’s to get some more.  But the evil knitting gods were not done torturing me.  My local Joann’s did not have the yarn.  I frantically went to Michael’s and Hobby Lobby with no luck.  I couldn’t believe it, to have come so far with this stupid sweater just to run out of yarn when I had 7 inches of sleeve left!  Once again the sweater was thrown in a corner as I pouted out my frustrations.

Two months later I was in Arizona for Thanksgiving.  Phoenix has a few Super Joann’s (which ABQ does not to my everlasting disappointment) and that was my last hope for finding the yarn.  (I didn’t keep the yarn label so I didn’t even remember the brand name to find it online, just how the logo looked.) 

My heart was pounding as I walked through the yarn aisles, searching for my yarn.  And then, the clouds parted, sunlight streamed in, and angels sang, because there it was!  I bought two skeins to be safe and went home ready to finish this sweater!


Even though I hadn’t worked on the sleeve in more than a month, I just picked it up and started knitting.  I thought I remembered the pattern.  I did not.  I knit about 5 inches when I realized that the sleeve did not look like the other one.  I looked at the directions and realized I had been knitting the last 5 inches completely wrong.  (And with small yarn and needles, 5 inches took me about 2-3 hours to knit).  Wasn’t this stupid sweater done punishing me yet!  I ripped out all my work and started over yet again.

Luckily for me, that was my last big mistake.  I finally finished the sleeve, stitched all the pieces together, wet and blocked the sweater, and crossed my fingers that it would fit when it dried.  And halleluiah because it did!  The sleeves were long enough, the body was long enough, and it wasn’t slipping off my shoulders.  It looks nothing like the pattern picture and it looks like I’m wearing it inside out, but who cares! 

All in all it took me over a year and half to make this.  And you may notice that just about all my mistakes were because of my lack of foresight and planning.  And reading.  I seem to have a habit of jumping right into craft projects without thorough preparation.  But after this I have definitely learned my lesson!  If I ever dare to take on a sweater again, you can be sure I will be following that pattern like my life depended on it!

Even though this project seemed like endless frustration, I am glad that it actually turned out as cute as it did and I have something to show for my efforts.  Next up on my needles: a pair of socks.  Wish me luck!