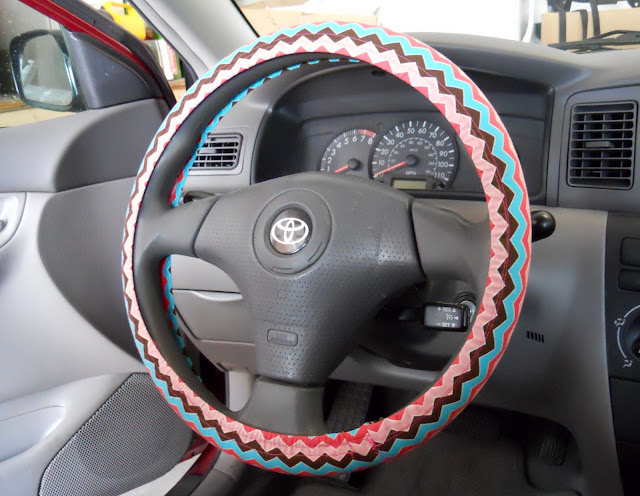
The idea to make my
own steering wheel cover has been floating around in my head for quite some
time. I don’t like how covers you buy
from the store always smell like an auto parts store and end up making the car
also smell like an auto parts store.
Plus they are always black or gray or brown, which aren’t exactly the
cutest colors out there.
I also wanted a cute
new steering wheel cover because I am borrowing my parent’s car while they are
living out of the country and I wanted to add some of my own flair to the
car. (I don’t think they would
appreciate me slapping some bumper stickers on it, even though that would jazz things up.) Plus the one already in the car is that
pleather material that burns your hands if it’s hot, which it often is.
I never made one,
though, because I thought it would be hard to do. Well I am happy to report that it is not hard
at all, and in fact this turned out to be a really quick and easy project.
Check it out! Cute, soft, unburnable, and free of auto
parts store smell. Success!
Now that you’re super
pumped to sew your own steering wheel cover, here’s what you need:
Fabric:
I used cotton fabric. The amount
you need depends on the size of your steering wheel so measure that first. I also used some fleece to make the cover
cushy.
Elastic:
I used ¼ inch elastic.
First you need to
measure your steering wheel, like so:
It was rather difficult to get a shot of this with one hand while trying to hold the tape on with the other hand, but what I do for my readers!
Make sure your
measuring tape is nice an tight so you get the right measurement. If you make it too long the cover could be
baggy. Add ½” for seam allowance.
You also need to
figure out the width of the cover, so measure the steering wheel again like so:
After measuring add ½”
to 1” seam allowance, depending on how big your elastic is.
For my steering wheel,
the measurements were 40” long and 4 ½” wide (that includes both seam allowances.)
After getting your
measurements it’s time to cut out the fabric.
Just cut a single strip in the length and width you need. Then cut a strip of fleece to the same length,
but take ½” off the width.
Next, fold and press the
sides of the fabric strip to make a casing for the elastic to go through. I folded mine over ¼” and another slightly
over ¼”.
Pin down and sew the
casing on the inner edge.
Next, take the fleece
and sew it down to the back of the outer fabric.
If you want to make it
extra cushy, sew down a double layer of fleece.
Now it’s time to put
in the elastic, which I never enjoy doing.
First, cut two pieces of elastic that are the exact length of your
steering wheel, in my case it was 39 ½”.
Attach a safety pin to
both ends of the elastic and start pulling it through the side tube you made
earlier.
Once you get it
through (hooray!), sew down one end of the elastic to keep it in place.
Repeat on the other
side of the cover.
Once both sides have
the elastic in, fold the cover in half with right sides facing, and sew the
edges together.
Trim it down, the flip
it over and sew down a zig-zag for some extra support.
And that is it! Now all you have to do it pop that baby on
your steering wheel and start looking cool!
If it’s too baggy,
just sew the ends together further down.
If it’s too tight and doesn’t fit, run back to your sewing room to try
again!
I’m loving this new
cover, it makes me smile every time I get in the car.
Hope you it try it
out! Thanks for reading!


