Anyway, sleeping with
half opened eyes naturally makes for restless sleep. Any light in a room is distracting to
me. If I take a nap during the day, I
often have super realistic dreams that take place in the room I’m in (I assume
because I’m looking at the room while sleeping.) For someone with funk eyes like me, a
sleeping mask is a life saver! Or should
I say sleep saver? ;)
I had a sleeping mask
that was too small and stiff so it fit weird.
I decided to make my own using some super soft velour fabric and shiny
brocade for some extra decadence. Here’s
the end result, worn by my model Dallas Star.
Want to make your
own? It is super quick; it only took me
about a half hour to make. Here is what
you need:
Maxi
Piping Bias Tape:
At least 22”.
Knit
Elastic: I used ¼” width.
Sleeping
Mask Template: You can draw out your own or use mine as a guide.
I made a template showing three different sizes. The largest size is what I used for my mask, the smaller sizes would be good for a child’s size, or if you just don’t want a bigger mask. Click on the image to see it larger. The second picture has lines drawn to make it a little more clear (or confusing, who knows). If you can’t see the picture well, the measurements for the largest size are 8 ½” long width, 3 ¾” nose length, and 4 3/8” for the cheek length. Take off ¼” to ½” from each measurement to get smaller sizes.
Now, let’s get
started!
First, cut out the template
on paper and use that to trace the design onto the two fabrics. Cut these out.
Take your piping and
start pinning it to your bottom fabric, with the right side of the fabric
facing up and the raw edge of the piping aligned with the raw edge of the
fabric.
Here’s a closer view
so you see what I mean:
Got it? Right side of fabric facing up, raw edge of
piping lined up with raw edge of fabric.
I pinned the piping on first, and then cut it. I used about 21”.
Next, sew on the
piping using a contrasting color to
your fabric. Using a contrasting color
will make the next steps easier. It can
be a little tricky to sew the curves of the eye mask, so just take it slow if
you need to. Fold the ends of the piping
under each other and sew it down securely.
Since we used
contrasting thread, see how easy it is to see the stiches on the other
side? Perfect.
Now you want to sew on
your elastic band. I cut my elastic to
15”. I found that measuring the back of
my head from one ear lobe to the other gave me a good measurement. Sew the elastic on to the back piece like so:
See how the raw edge
of the elastic lines up with the raw edge of the fabric?
Make sure the elastic
isn’t twisted, and then sew it down. At
this point you can try on the mask to make sure the elastic fits. Does it fit well?
Perfect!
Okay, almost
done! Now take your top fabric and pin
it to the bottom fabric with right sides facing.
Pin it together with
the bottom fabric on top so that when you sew you can see the colored stiches.
Now change your thread
to a matching color. Make sure that the
elastic is tucked inside! Sew all the
way around right on top of that colored thread.
This way, when you turn it inside out the piping will come out evenly on
both sides. Leave a small hole to turn
the mask out when you’re done.
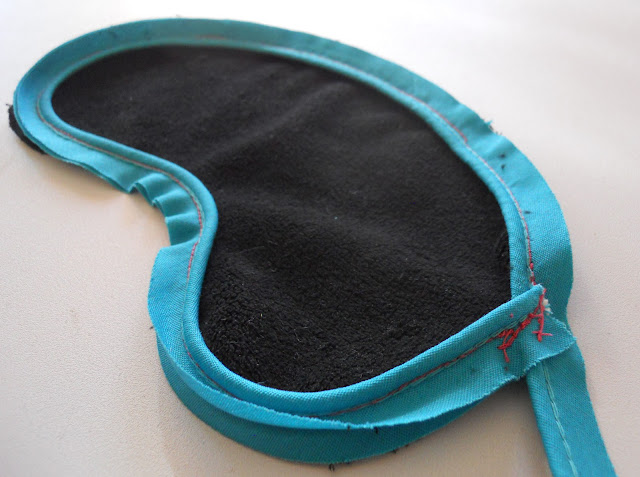
Turn the mask out,
tuck under the fabric at your hole and stitch that closed. And you’re done!
You can see at the
bottom of the eye mask where I stitched my hole closed, it isn’t even
noticeable.
Quick, easy, and
already done! Now you can go have some
sweet dreams!
And wake up bright
eyed and bushy tailed!
Or bushy haired, in my
case.
These eye masks are so
fast and easy to whip up, they would make some perfect last minute Christmas
gifts!


nice :) thx
ReplyDelete