


Did I say I’d put this
post up Tuesday? I obviously meant
Thursday.
Anyway, on Monday I
shared a tutorial on how to finger knit.
Today I am showing how I upgraded the technique using leather lace to
make some cool and funky accessories.
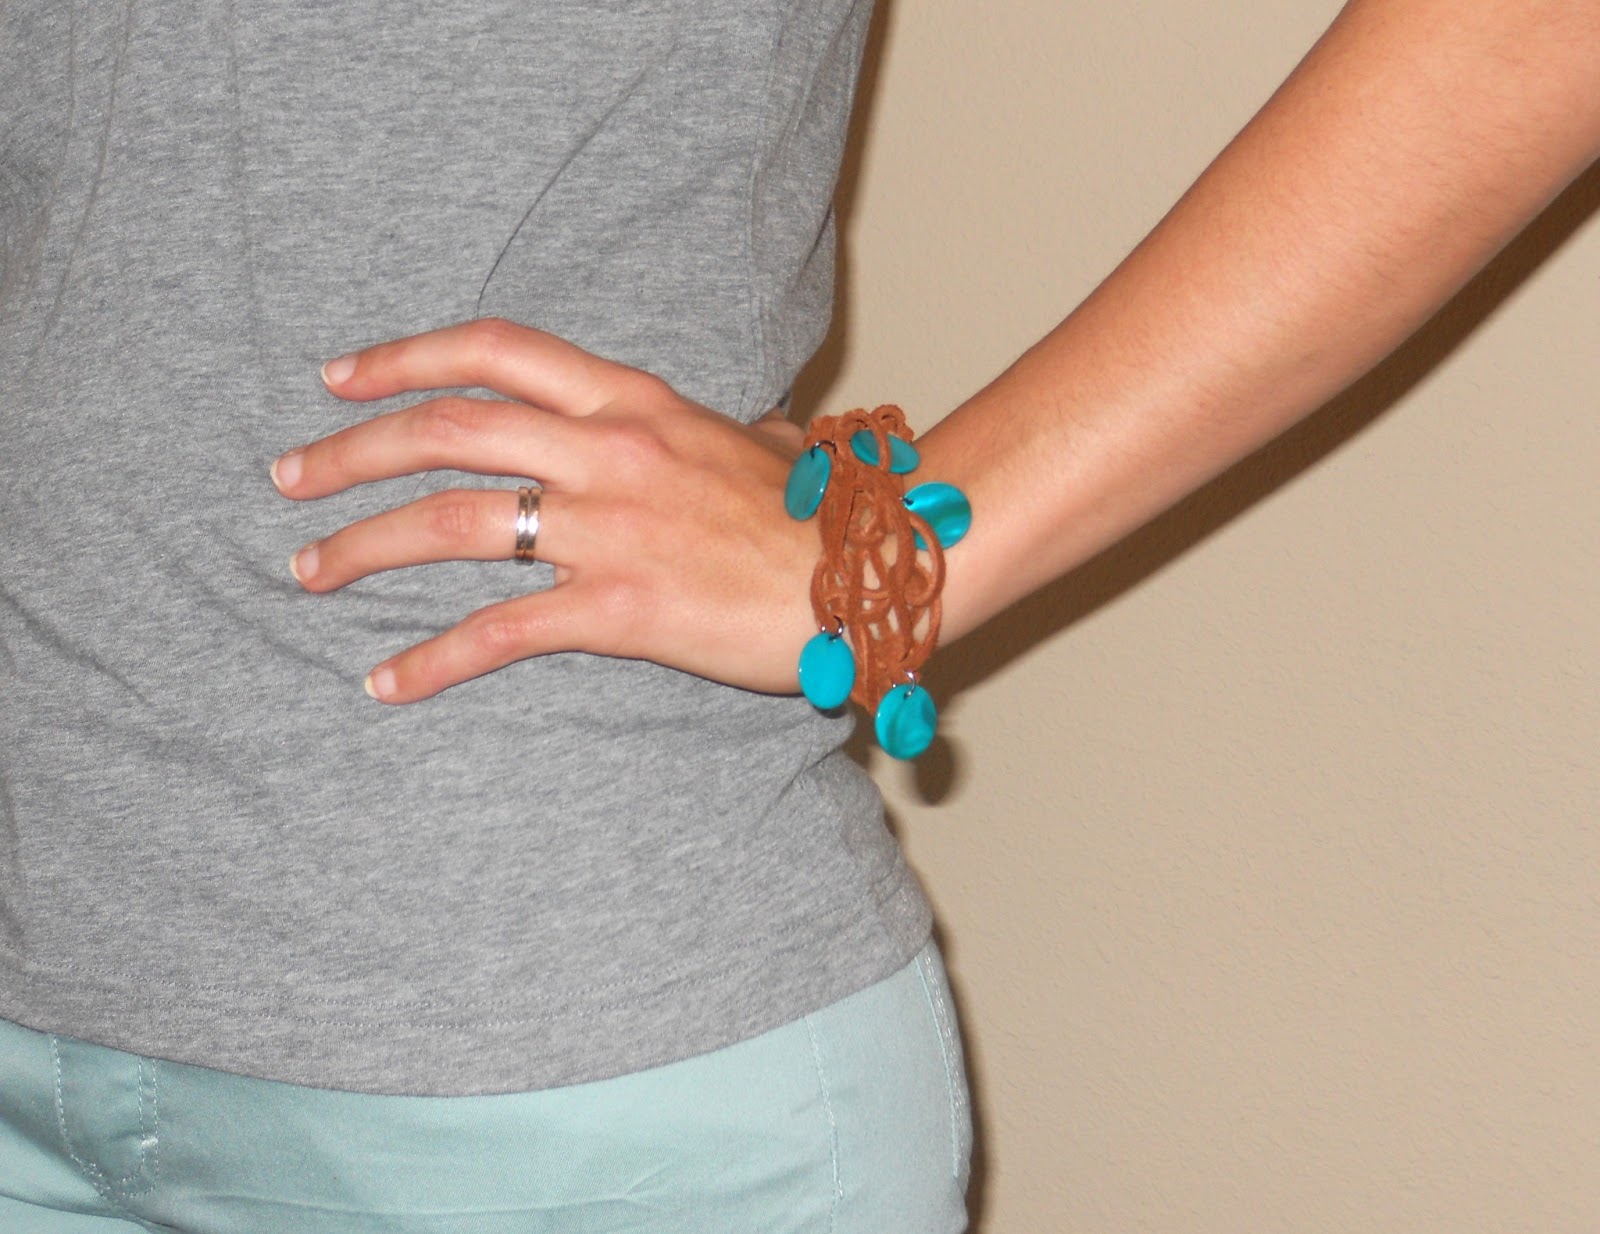
I made a necklace and bracelet
that I love:

Another necklace that
is so so:

And a belt that did
not turn out as awesome as I envisioned in my head. I think I’ll work on that design a bit more
and see if I can make it work out.
Want to make your own
awesome leather jewelry? Here’s what I
used:


Leather
Lace: You can find leather lace at your local
fabric store (I got these at both Joann’s and Hancocks. Mine is ¼ inch thick.) The length varies based on what you are
making. For the bracelet I used 3 yards,
for the necklace I used 4 yards. If you want to take a stab at making a belt you will need at leat 10 yards.
Leather
Cording: In the second picture shows leather
cording, it is much skinnier and better for adding beads to. I used 8 yards for the long necklace.
Bedazzlement:
Grab some funky charms, beads, or whatever to add on. Also helpful, some jewelry clasps and rings.
Refer back to the
finger knitting tutorial if you need a reminder on how to do that. Working with leather lace is much different
from working with yarn. Yarn is stretchy
so you can easily pull it away from your fingers, but the lace is stiff and
tight, so you need to make sure that you keep it loose around your fingers.

In the above picture
you can see how I pulled the lace away from my fingers to make it easier to
pull off. Also, the leather lace can
snap if you pull it too tight, so another good reason to keep it loose.
For the bracelet and
necklace made with the leather lace, I just knit them up as normal and added
the charms afterwards using jewelry rings.
Super easy!
For the black necklace
using the leather cording I added the beads as I knit. To do this, before you start you need to
string all the beads you will use onto the cording.

Start the finger
knitting as normal. After the first
pass, pull up four beads and arrange them so one is under each finger, like
this:

Then just knit as
normal, making sure that the bead stays next to the finger.

Does that make
sense? Do this for each finger. Work one row with no beads, then pull up four
more beads and repeat. Keep doing this
until you have the length you want. Here
is an up close shot of the finished necklace:

It is funky and chunky
and I love it!
To finish off each
piece I added some jewelry clasps.

These were fun to make
and are fun to wear! Hope you try it
out!
I really like the necklace with the yellow beads. Maybe I'll actually have to try it out! PS I thought I already left this comment but I don't see it. And I'm trying to show mom how to comment again.
ReplyDelete