Friday, December 28, 2012

Exploring NM: ABQ BioPark River of Lights


Every year the New Mexico BioPark Society does the River of Lights light display.  This display is just awesome.  They use metal and rope light to create amazing light sculptures of animals, plants, and Christmas scenes.  It is a really fun thing to see, and I think it may become a Christmas tradition for us.

If you live around Albuquerque and haven’t been here, you are really missing out!  The last day to see the display is December 30th.  It was freezing cold and my toes went numb, but worth it! 

My favorite part was discovering that they had been yarn bombed:


Ha!  I love it!

Here are a bunch of pics of my favorite light displays:


I know this is a lot of pictures, but it's only a handful of the displays they've created.  If you're in ABQ I hope you go check it out!
Thanks for reading!

Wednesday, December 26, 2012

Knitted Mini-Washcloth Tutorial -or, Reusable Cotton Pad

Because who doesn’t need a stack of mini-washcloths, right? 


This idea was actually born because I didn’t want to buy a bag of cotton pads that I would only use sporadically, but would meantime be taking up bathroom cupboard space.  Instead I dug through my yarn stash and whipped up a couple mini-washcloths. 


Perfect size for removing stubborn eye make-up or applying toner.  (I don’t really wear much make-up, so I don’t know how well these would work as a make-up applier.  Knit one up and try it out!  And when they get dirty you just toss them in the washing machine.

These are quick and easy to make, and they are the perfect practice project for new (and even experienced) knitters.  They are made using Double Pointed Needles (DPN’s), which can seem tricky if you’ve never knit with them in the round before.  The first time I knit a hat in the round I had loose, ugly stitches when I had to switch to DPN’s.  After making a couple of these washcloths, you’ll be a pro at knitting nice, tight stitches on DPN’s. 

Are you super excited now to get started!!  Here’s what you need:
 

Cotton Yarn:  I used Sugar ‘n Cream brand.  I recommend using cotton because it is machine washable and doesn’t pill too much.  I made one using a wool/acrylic blend and it was too scratchy to use on the face.  This cotton is nice and soft.

Double Pointed Needles:  I used size #8 needles, even though this yarn calls for #9 needles.  With the smaller size I was able to get tighter stitches and a better look.


Knitting Instructions

Knitting Key:  DPN: Double Pointed Needle;  K: Knit;  K2TOG:  Knit 2 stitches together;  *: Repeat

Cast on 25 stitches.  Purl one row, insert a stitch marker and join stitches, making sure your stitches are evenly distributed over the DPN’s. 

Be careful not to twist your stitches when joining the yarn!

Row 1: K all stitches

Row 2: K3, K2tog* repeat from * 5 times, 20 stitches remain.

Row 3: K

Row 4: K2, K2tog* repeat from * 5 times, 15 stitches remain.

Row 5: K

Row 6: K1, K2tog* repeat from * 5 times, 10 stitches remain.

Row 7: K

Row 8: K2tog* repeat from * 5 times, 5 stitches remain.

Cut your yarn leaving a couple inches for a tail.  Using a yarn needle, pull the tail through the remaining stitches and pull tight to close.  Pull the yarn through the center to the back of the washcloth and weave in the ends.

Wet down the washcloth and lay it flat to dry.  Knit a whole bunch more cause it’s just so fun, and then you’re done!

The final measurement has a 2 ¾” circumference.  Here are some pics of the process:

Row 1:

 
Row 6

 
Finishing:


Here are close ap pictures of the front and back:


And just for fun:


Cause I’m crafty like that!

I hope you try these out!  Thanks for reading!

Tuesday, December 11, 2012

DIY Mini Christmas Tree Tutorial


About a month ago I was out shopping and saw something similar to this tree at a store (can’t remember which now).  It looked super cute, but the design was so simple I knew I could make one myself, and for less than the $40 it cost.  I think mine turned out great! 

Want to make your own?  Of course you do!  Here’s what you’ll need:


5 wooden dowels:  Mine are about a ¼” thick and 12” long.  I got these at Hobby Lobby.

Base:  I used a thing called a tread wheel.  Make sure the hole size matches your dowels.  I also got this at Hobby Lobby.

Star and ornaments:  For the star I got a paper mache star at JoAnn’s and covered it in gold glitter.  I also got the mini ornaments and bells at JoAnn’s. 

Drill and screws:  Make sure to get screws that aren’t too long so they don’t poke out too much behind your tree.  Also make sure your screws match your drill bit size.

Let’s get started!

First, lay out how you want your ornaments arranged so that you know where to cut your dowels.  I wanted four rows, so I did 8 bulbs on the bottom, then 6, 4, and 2 at the top.  If you want to make a larger one, just more rows to the bottom.  Here’s my final measurements:


While my bulbs were laid out I also measured how much room I needed between each row, which was 2” between each row.

After marking my measurements I cut each dowel to the right size.  These are small enough that I was able to use a wire cutter thing to snip them off.


Sand down the edges of all the dowels.  Now draw a mark on each dowel right at the center.  Also draw a mark on the long dowel where you want each row to go (again, mine were 2” apart).  Get your drill and drill a hole through each mark.

This part can be a little tricky to get all the holes on the long dowel exactly lined up.  Mine isn’t perfect, but when it’s all finished with the bulbs on it really isn’t that noticeable, so don’t stress about getting the holes perfectly lined up.

(As an alternative here, my first try at making this I nailed the dowels together, but that ended up just cracking the wood.  But, if you don’t have a drill, nailing could be a good option if you don’t mind the cracked wood.  Or you could try gluing the dowels with a strong glue.)

Okay, now it’s time to screw it all together.  I found it easier to screw the dowels on by clamping down the long dowel to a table. 


I also put a small dab of my trusty Gorilla Glue in between the dowels just for a little extra stay-put power.  Screw in all your dowels:


And glue the whole thing into your base.  I used the clamp to help keep it straight.


You can see in that pic how my rows aren’t perfectly straight, so again, don’t stress about getting it perfect.  It’ll still look good!  While that’s drying you can take this time to glitter up your star.

After the glue has dried, paint the whole thing.  I used brown spray paint, but acrylic craft paint would work too.  Once that is dry you’re ready to start adding the bling!


I used the gold thread that came with the bells to tie on each bulb.  You could also use ornament hooks or whatever you have on hand.  I also dabbed a bit of glue on each of the end bulbs so I wouldn’t worry about them slipping off.  Lastly I glued on my glittered star:


And finished!  I love it!


I think I might make another one and paint the tree silver with silver and blue bulbs.  Or paint it pink with pink and turquoise bulbs!  Oh the possibilities! 

I hope you give this a try!


Monday, December 10, 2012

Sleeping Mask Tutorial

I have a weird little hereditary trait that affects many in my family.  I sleep with my eyes half open.  Anyone else out there like this?  It can creep people out if they’ve never seen it before, as my eyes roll back in my head so it’s just the whites of my eyes poking out beneath my half-closed lids.  But it’s normal in my family!

Anyway, sleeping with half opened eyes naturally makes for restless sleep.  Any light in a room is distracting to me.  If I take a nap during the day, I often have super realistic dreams that take place in the room I’m in (I assume because I’m looking at the room while sleeping.)  For someone with funk eyes like me, a sleeping mask is a life saver!  Or should I say sleep saver?  ;)

I had a sleeping mask that was too small and stiff so it fit weird.  I decided to make my own using some super soft velour fabric and shiny brocade for some extra decadence.  Here’s the end result, worn by my model Dallas Star.


Want to make your own?  It is super quick; it only took me about a half hour to make.  Here is what you need:

 
Two pieces of fabric:  I used the velour and brocade; you could use flannel, baby quilt material, anything soft and fuzzy.  Or satin, ooh that would be nice too.  You only need a piece that’s at least 10” x 6”, so you can use whatever scraps you have on hand.

Maxi Piping Bias Tape: At least 22”.

Knit Elastic:  I used ¼” width.

Sleeping Mask Template:  You can draw out your own or use mine as a guide.


I made a template showing three different sizes.  The largest size is what I used for my mask, the smaller sizes would be good for a child’s size, or if you just don’t want a bigger mask.  Click on the image to see it larger.  The second picture has lines drawn to make it a little more clear (or confusing, who knows).  If you can’t see the picture well, the measurements for the largest size are 8 ½” long width, 3 ¾” nose length, and 4 3/8” for the cheek length.  Take off ¼” to ½” from each measurement to get smaller sizes.

Now, let’s get started!

First, cut out the template on paper and use that to trace the design onto the two fabrics.  Cut these out.


Take your piping and start pinning it to your bottom fabric, with the right side of the fabric facing up and the raw edge of the piping aligned with the raw edge of the fabric.

 
Here’s a closer view so you see what I mean:


Got it?  Right side of fabric facing up, raw edge of piping lined up with raw edge of fabric.  I pinned the piping on first, and then cut it.  I used about 21”.


Next, sew on the piping using a contrasting color to your fabric.  Using a contrasting color will make the next steps easier.  It can be a little tricky to sew the curves of the eye mask, so just take it slow if you need to.  Fold the ends of the piping under each other and sew it down securely.


Since we used contrasting thread, see how easy it is to see the stiches on the other side?  Perfect.


Now you want to sew on your elastic band.  I cut my elastic to 15”.  I found that measuring the back of my head from one ear lobe to the other gave me a good measurement.  Sew the elastic on to the back piece like so:


See how the raw edge of the elastic lines up with the raw edge of the fabric?


Make sure the elastic isn’t twisted, and then sew it down.  At this point you can try on the mask to make sure the elastic fits.  Does it fit well?
 
Perfect!


Okay, almost done!  Now take your top fabric and pin it to the bottom fabric with right sides facing.


Pin it together with the bottom fabric on top so that when you sew you can see the colored stiches.


Now change your thread to a matching color.  Make sure that the elastic is tucked inside!  Sew all the way around right on top of that colored thread.  This way, when you turn it inside out the piping will come out evenly on both sides.  Leave a small hole to turn the mask out when you’re done.
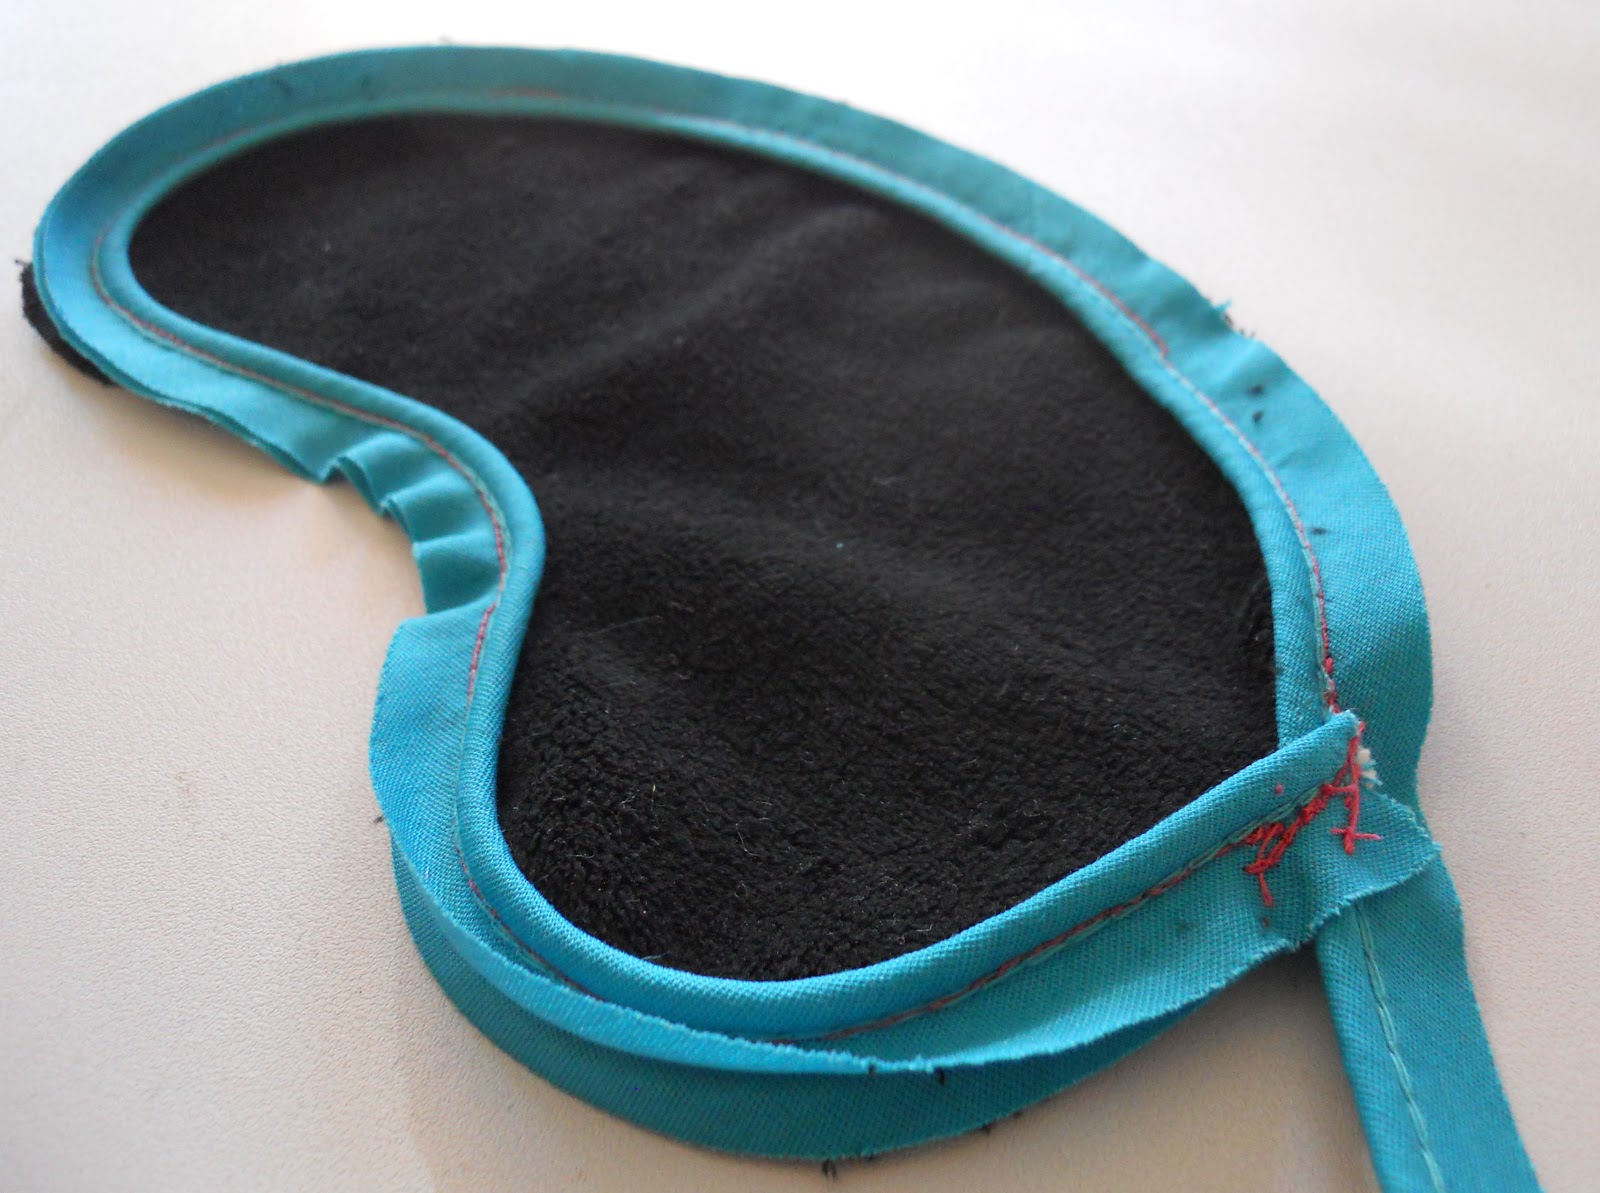


Turn the mask out, tuck under the fabric at your hole and stitch that closed.  And you’re done!


You can see at the bottom of the eye mask where I stitched my hole closed, it isn’t even noticeable. 

Quick, easy, and already done!  Now you can go have some sweet dreams!


And wake up bright eyed and bushy tailed!


Or bushy haired, in my case.

These eye masks are so fast and easy to whip up, they would make some perfect last minute Christmas gifts!