


I ended up making two:
one funny and one with my workout mantra:


I think I saw the
phrase ‘I am making myself epic’ in a Nike ad a long time ago, but I don’t
really remember. But, it definitely gets
me motivated when I’m in the middle of a workout and don’t want to keep going. Having it right there on my shirt makes me
feel like working extra hard!
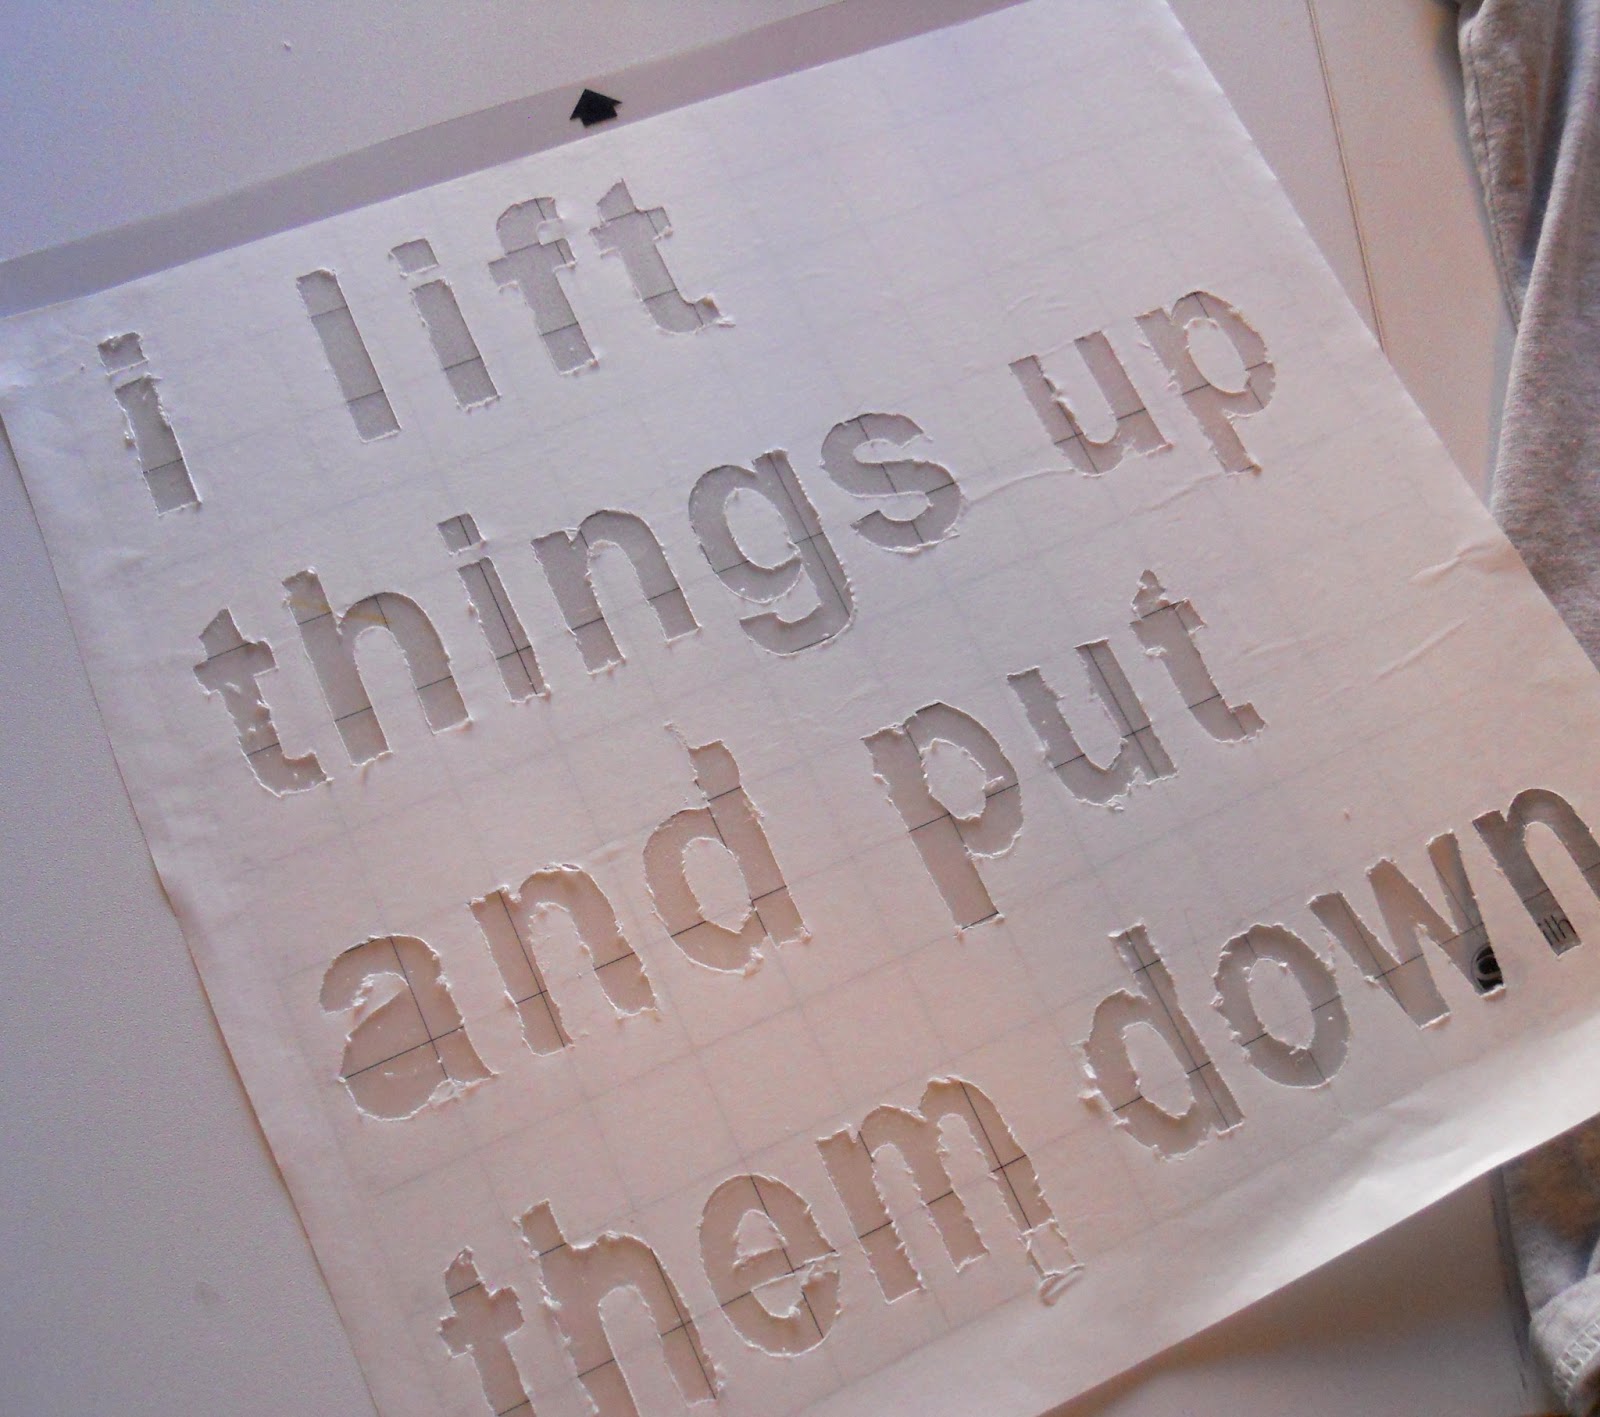
The one that says ‘I
lift things up and put them down’ is from a Planet Fitness ad. Have you seen these ads? They are so funny. There weren’t any Planet Fitness’ in LA, so I
didn’t hear of them until I moved to ABQ.
Here is the ad this phrase is from, so you can join in the hilarity:
Ha, that makes me laugh whenever I hear that. I don't go to that gym, but they have funny ads.
Now, on to the making of these awesome tees.
I made a stencil out of freezer paper. Have you ever done this before? It is super easy, and I know there are lots of tutorials about it out in the universe already, but I’ll throw my two bits in.
I like using freezer paper because it is so cheap, so if you mess up while cutting out your stencil you can just toss it and start over. I used my Silhouette machine to cut out my design, but you can also just cut it out by hand using a knife or scissors.
Here’s what you need to make some tees like mine:

Fabric Paint: I use the Tulip brand (bought at Jo Ann’s). I’ve used this paint before and I really like it.
T-Shirts: I used 100% cotton tees that I got at Target, they are Champion brand.
Other: Iron, to set the freezer paper. Knife or scissors to cut out your design if you aren’t using a machine. Paint brush or sponge to apply the paint. Awesome phrase to get you pumped to workout.
First, you need to decide how you want your phrase to be laid out on your shirt. Put the shirt on and mark with a pencil where you want the words to start and end, as well as how far to the sides you want the words to go. I didn't want to words to wrap around my body and make it hard to read.

Take it off and
measure your markings. For example, the
markings for my ‘lift’ tee ended up being 9” wide and 14” long, starting about
3” down from the collar. Since I wanted
four rows of words, I used my measurements to calculate that my letters would
need to be 3” tall with ½” space in between each row. Make sense?
Figure all this out before you even start so that it comes out looking
just how you want it.
After getting that all
figured out, write out your phrase in the Silhouette program or Word. If you are using Word, make sure you bold the
letters so that they are big enough to cut out as a stencil (or use Word Art to
get the bigger letters.) I like using
the Silhouette program because it makes it easy to get the letters to the right
size.

If you are using Word,
when you design is done, print it out and lay the freezer paper on top of it
shiny side down. Then just trace your
design onto the freezer paper and cut it out.
If you are using a Silhouette, cut out the freezer paper into a 12x12 square and stick it to a cutting mat with the shiny side down. Then follow the steps to cut it out. It took me a few tries to get the right cutting settings for the freezer paper. I set the blade length to 5 and selected cut twice, and I still had to use a knife to get some of the letters off. So, I suggest doing practice cuts (which I didn’t do) until you find the setting that works for you. You'll notice in the 'lift' tee that the letters aren't very crisp because I had to cut them out more, but in the 'Epic' tee I had adjusted the settings and the letters came off easier.
Once that’s cut, peel
out the letters.
And then peel off the
freezer paper. I will get all rolled up
like this:

But it easily lays
flat once you start ironing it:

Use a high heat for
your iron, and make sure everything is down nice and tight so you don’t have
any paint bleed. Remember, iron the shiny side down. Now it’s time to start
painting!
First, but a piece of cardboard or thick paper in your shirt so the paint won’t bleed to the other side.

And make sure that
piece is big enough. Mine wasn’t and so I
did have some paint bleed through to the back of the shirt, but it’s not too noticeable.
Then just squirt out your paint and put
it on.


Once your paint is on,
carefully peel off the freezer paper. Don’t
wait for the paint to dry before taking the paper off, as that increases the
chances that the paint may bleed. Also
be careful as you take the paper off that you don’t drop it and get paint on
other parts of your shirt, or your craft table.
You can see my table’s nice new black smear in the upper right corner of
this pic:

Oops.
That’s it! Let your paint dry, and follow the directions on the bottle (I know some brands need to be set by ironing, but the paint I used doesn’t.) While that one is drying make yourself another awesome tee.
That’s it! Let your paint dry, and follow the directions on the bottle (I know some brands need to be set by ironing, but the paint I used doesn’t.) While that one is drying make yourself another awesome tee.


And done! This was a quick and easy project, I made
both of these in an hour (besides drying time).

And now I am ready to
look awesome showing off my muscles at the gym:

Or maybe out on a run:


Or maybe just jumping around in my backyard while my neighbor looks at me like I'm a weirdo.
My husband insisted I take a picture holding a water jug like the dude in the commercial.
My husband insisted I take a picture holding a water jug like the dude in the commercial.

Yep, I am now the
coolest chick at the gym. Hope you try
out this technique and make your own awesome shirts! Thanks for reading!

No comments:
Post a Comment